Map, Compass & GPS

Map, Compass & GPS
Wild flowers along Fall Creek on the way to the Green Lakes - Oregon
Showing posts with label survival. Show all posts

Sunday, March 7, 2021

It Has To Work For You

 It Has to Work For You


So what is the right stuff to carry in the outdoors?  What is the minimum?  What should you consider before hitting the trail?
A climbing group in the 1930s, The Mountaineers from Seattle authored the “Ten Essentials” describing ten items that should always be carried in the backcountry.  “The Ten Essentials” has been modified by different groups over the years.  Consider this list the foundation of your kit.
Test you equipment before you go afield.  In my Wilderness Survival class I emphasize the phrase “it has to work for you.”  Friends enjoy providing input and helpful suggestions.  Don’t blindly assume these are sound recommendations.  Test that new stove during harsh winter conditions.  Determine if dryer lint fire starter will actually ignite in the rain or if it will burn hot for six minutes. 

Interestingly, in my Wilderness Survival class I hear,”… this is used by the Special Forces." Well, OK, but is that really true or better yet, is that important for your needs.  Because our Special Forces might use a “chem. light” to signal with, a bright strobe will be a better signaling device for you when lost.  It gets down to research, experience and honest evaluation.
The bottom line is that whatever you put in your pack, your equipment has to work for you.  It needs to be able to work rain or shine, at altitude, simply, and with little effort.  Finally, wherever you go this pack must go with you every time; no excuses.
Getting Ready
Invest the time in your own personal training and education.  Start a plan to get ready for the next hunting season.  Let me frame this for you by suggesting the following strategies.
We can all use a refresher in First Aid.  Much has changed with CPR; the techniques of 2000 have been improved.  Give serious consideration to a Wilderness First Aid class.  This is a time consuming (16 hour), pricy ($150-$200) class that provides you with the serious tools of backcountry emergency care.  Why not make it fun and have the entire hunting party take the class. Find classes through the American Red Cross or the National Outdoor Leadership School (NOLS).

Understand the basics of land navigation.  Major outdoor retailers and Community Colleges offer classes.  Land navigation is not hard but it is a perishable skill.  If you are the team navigator, your skill and techniques have to work for everyone. 
Wilderness Survival is a topic that has become very popular. Take a class that provides you with the latest on new products, equipment and techniques.  Classes that take a commons sense approach to survival with modern component s is my recommended first priority.  Primitive skills could follow later and will complement what you have learned.
Dedicate an afternoon to serious evaluation of your hunting day pack.  Lay everything out on a table and go through it.  Dump the old batteries, refresh the first aid kit, test you gear, remove expired foods and medications and replace what is broken.

Invest your time at the rifle range.  Treat your rifle for what it is – a precision piece of equipment.  Accuracy comes with time, effort and patience.
Get in shape.  Backcountry travel is strenuous.  Your exercise regimen should be strenuous too.  Now is the time to begin.
Step by step you can become better prepared and ready for your fall hunt.  Develop your marksmanship and land navigation skills.  Build up your pack with the essentials that will work for you.  Have confidence in your equipment.  And no matter what you do never leave the day pack and survival gear behind.

Tuesday, November 6, 2018

The Essentials For Your Day Pack


Always Carry The Right Gear

On a warm afternoon in July, a family leaves a trail head with the goal of summiting the South Sister Mountain in Central Oregon.  It was a rough hike as they took a path not frequently traveled.  By evening it became obvious that this group would not make it to the summit and the glacier they were attempting to cross was icing up; it just wasn’t safe to press on.  911 was called and a local SAR team reached them after midnight.  The temperature on the glacier dropped below 40° (F) and the hikers were getting cold.

When the SAR team reached them, they found that the group had some food and water but no other gear.  The hikers’ clothing selection was questionable too.

So what is the right stuff to carry in the outdoors?  What is the minimum?  What should you consider before hitting the trail?

A climbing group in the 1930s, The Mountaineers from Seattle authored the “Ten Essentials” describing ten items that should be carried in the back country. 

“The Ten Essentials” has been modified by different groups over the years.  The following is the list that REI recommends:

  1. Navigation
  2. Sun protection
  3. Insulation (extra clothing)
  4. Illumination
  5. First-aid supplies
  6. Fire
  7. Repair kit and tools
  8. Nutrition (extra food)
  9. Hydration (extra water)
  10. Emergency shelter
    1. A space blanket is fine to carry but it is a poor shelter.

This is the minimum that one should carry; it is a starting point.  The key is to always carry your kit with you.  I have a day hiking kit that fits into a fanny pack.  It is only limited by its poor ability to carry extra clothing.


Friday, November 10, 2017

Pacing

 Many outdoorsmen measure distance in the backcountry by using a Global Positioning System (GPS) receiver.   GPS receivers are reasonably accurate, real time, and provide distance traveled and distance to a destination.
But what does the hiker do if they don’t have a receiver, the GPS fails or batteries die?
A proven method for estimating distance is known as pacing.  Pacing is not as accurate as the GPS receiver, but it can give a reasonable approximation of the distance traveled.  Together with a map and compass, pacing is an important component of evaluating a hiker’s track through the backcountry.  In darkness or periods of low visibility pacing helps to determine the hiker’s location through a process known as dead reckoning. 
Pacing is a method that begins with measuring one’s stride, with the intent of determining an individual’s length of stride. A pace is a measured two steps; a complete stride.  As illustrated below, every time the right foot hits the ground is one pace. Each pace (two steps) normally measures out to almost 50-60 inches.

Perhaps the best method to determine a hiker’s pace is to record it over a specific distance to determine an average.  Before embarking on the trail, the individual should develop a “pace average” over a controlled area first. 
For example, measure the number of paces for a known distance of 100 yards.  To achieve this, go to a high school foot ball field or track.  Walk along a sideline from end zone to end zone.  Count how many paces it takes to go 100 yards.  Do this eight times and record the total number of paces for each 100 yard event.  Determine the average for all eight 100 yard lengths completed.  The result is that the hiker may determine that the average 100 yard pace count to be 58 ½ paces.  (With children compensate and be mindful of their strides being significantly different, including a skip here and an off trail discovery there.)
Whatever the “pace average” may be, do keep the stride natural and smooth.  Don’t try to exaggerate and unnaturally lengthen the stride.
Don’t get too bogged down in the estimation of the accuracy of the average pace. Of larger importance is to understand the complexity of the terrain and how it will impact stride and a hiker’s “pace average”.   Anticipate strides being different.  Take the time beforehand to imitate a 100 yard course on sloping ground.  Further, try a 100 yard pace in soft soil and hard soil, smooth ground and rocky ground. Move to other locations once an average pace is found on a controlled level environment (football field).  Layout a 100 yard course on sloping ground. 
Pacing over long distance can become quite boring and the hiker easily distracted.  This is especially true when the pace count is in the hundreds.  Was that pace 545 or 554?  In such cases pacing beads may be a useful tool.  Pacing beads can be purchased from online venders or made at home using paracord and simple beads. 
A quick Google search will turn up several methods for using pacing beads.  For example, Wikipedia states that “As users walk, they typically slide one bead on the cord for every ten paces taken. On the tenth pace, the user slides a bead in the lower section towards the knot. After the 90th pace, all 9 beads are against the knot. On the 100th pace, all 9 beads in the lower section are returned away from the knot, and a bead from the upper section is slid upwards, away from the knot.”
Pacing beads can be an important asset when Dead Reckoning (known as DR) with a map and compass.  Vigilant compass sighting and a steady “pace average” helps provide a rough approximation of both distance and direction when moving through the backcountry.


Monday, September 4, 2017

Escape or Shelter In Place


A few years ago I wrote a short post about Planing  Your Escape Route.  I recommended that when evaluating an escape route I suggested that the hiker consider several elements. 
First, take a look at your topographic map and tail guides to determine potential escape routes.  Evaluate the terrain.  Are there barriers due to slope and vegetation?  This is especially true should the hiker need to “bush whack” cross country.  A conversation with a ranger can be invaluable.

Right now my home state of Oregon is ablaze with wild fires.  Fires are everywhere.  Here is an overview of all the fires as of 8/30/2017.

Just recently over 100 hikers found them selves stranded as fire closed their trail and were trapped between blazes.  They have been rescued, they survived and they are lucky.


Tuesday, July 4, 2017

Knots In the Backcountry


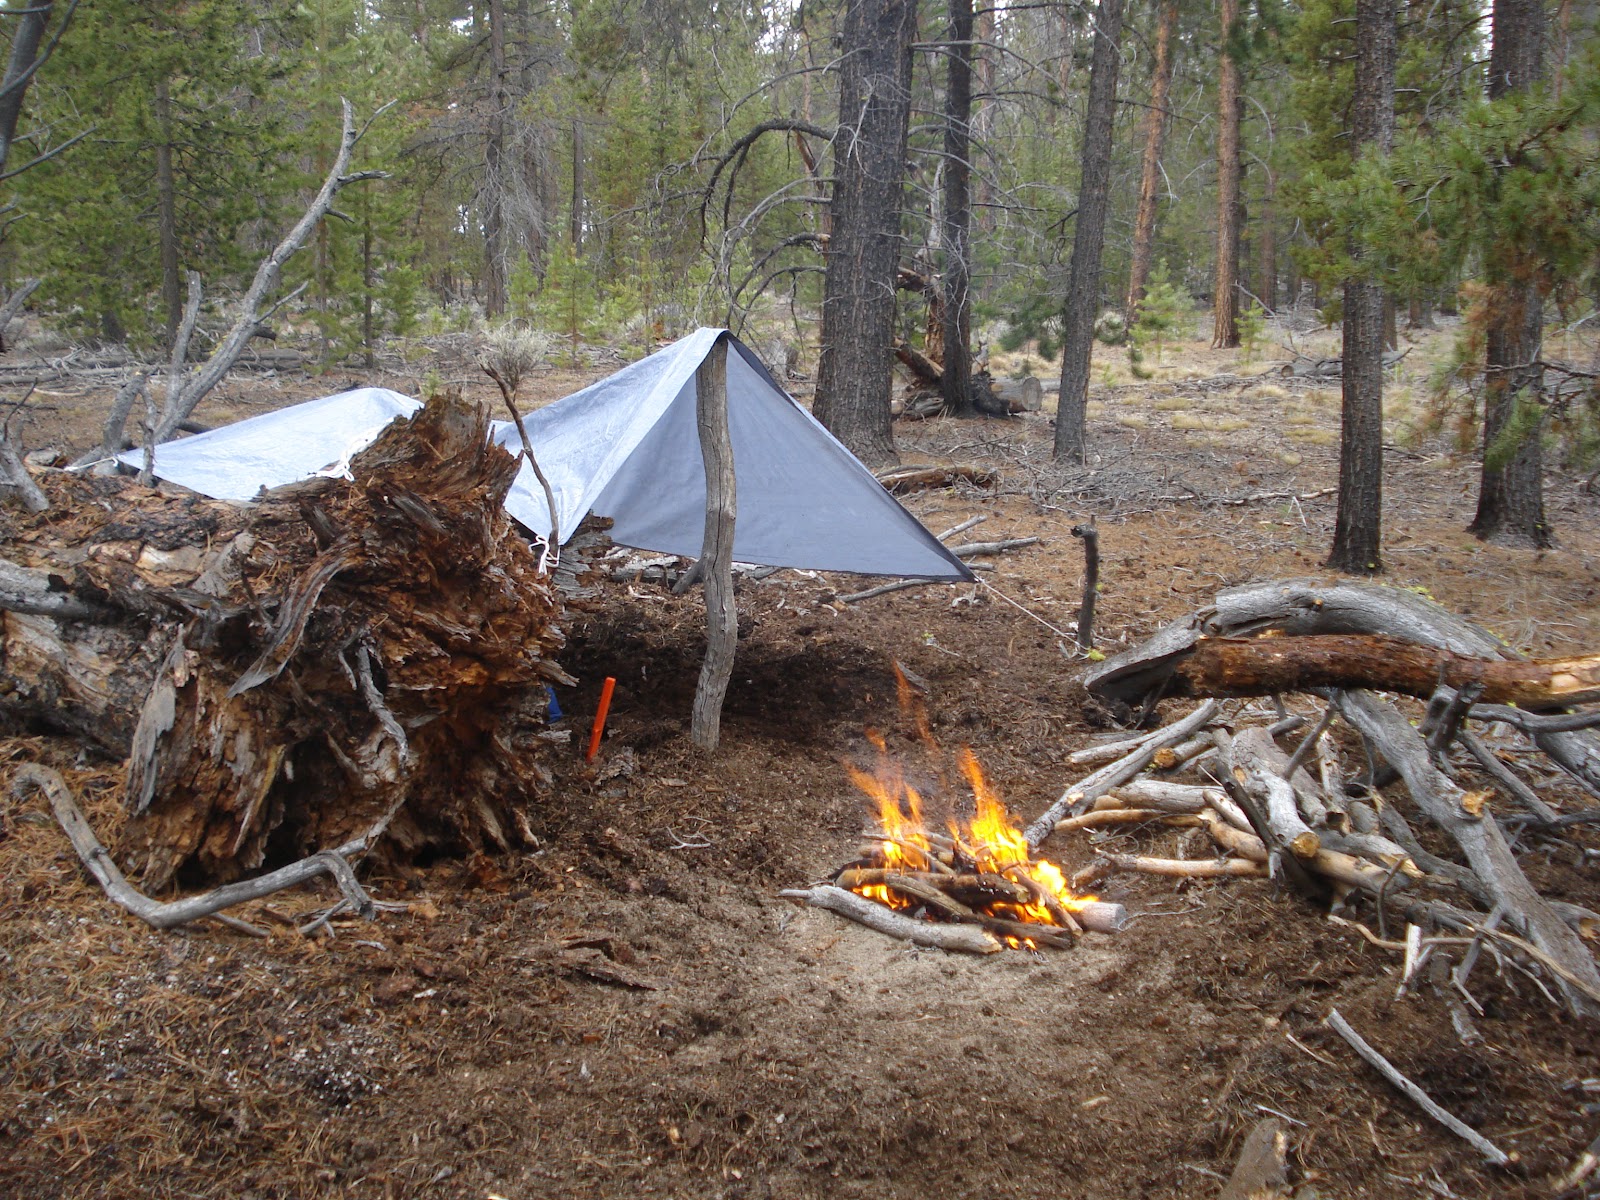
Several years ago I had the opportunity to take an abbreviated wilderness survival course conducted by Emergency Response International (visit www.eri-online.com).  One component of their presentation was emergency shelters.  Key to emergency shelter building is the ability to tie a reliable knot.

First, the hunter needs to carry shelter material.  This can range from a poly tarp (with numerous grommets) or one of the many nylon tarps sold through high end retailers such as REI.  A tarp of 8’ by 10’ is adequate.   Secondly, 50 feet good quality parachute cord is needed to tie the shelter to a tree or pole.  Quality parachute cord has a breaking strength of 500 pounds and can be found at a surplus store or on-online.  (There is some junk para cord out there so be careful with your selection.)


An excellent resource for knot tying is an online web site animatedknots.com.  This site offers downloadable apps for the smart phone and categorizes knots by topic (such as scouting, boating and fishing.  The instructions are concise and easy to understand.

There are hundreds of knots that the hunter can choose from.  I recommend learning just a few knots that expand beyond tying your boots or the square knot.

A great knot to start with is the timber hitch.  Wikipedia claims that the timber hitch was first mentioned in a nautical source around 1620. 

“The timber hitch is a used to attach a single length of rope a cylindrical object. Secure while tension is maintained, it is easily untied even after heavy loading.”

Wikipedia

 The timber hitch is a friction knot.  The many wraps of rope or parachute cord hold firmly under tension.  It’s simple and easy to use and can be the anchor of a tarp.  Best of all, after being placed under tension it won’t become next to impossible to untie; we have all been there.


For complete instructions watch the video at animated knots:

www.animatedknots.com/timber


Monday, June 5, 2017

Your Personal Outdoor Plan

There are lots of articles and posts about letting the responsible person know about your travel plans.  Should you not return home on time they are the trigger to begin the search process.


This may be the most comprehensive plan made yet!!!


After the loss of James Kim in the Oregon back country in 2006 I wrote a hiker's trip plan and posted it on my web site.  I had input from several valued sources.  I wanted something better for the wilderness traveler than a note to a neighbor.  My intent was to provide the search responders something valuable to go by.


In far too many SAR missions, the reporting party has little information for the searchers to go on to begin their search.

My plan can be found here.  It is a basic .pdf form.

Suggestions are certainly welcome.


Today, while reading a Linkedin email, I received a tip on what might be the most complete plan yet.  It's from Paul Kirtley's blog.  He is an  experienced bush craft author in the UK.  This plan is much like the hiker's flight plan.  It includes a place for a picture of the hiker, data for one's route and much more.


Check out Paul Kirtley's plan here.


911 Call center
Still, that responsible person plays a huge role in contacting authorities to begin a search.  My recommendation would be to pick a person that will make the 911 phone call without hesitation.


Travel safely.

Sunday, April 23, 2017

Extreme Weather Survival

Wes Siler recently wrote a fine article in OUTSIDE magazine titled "The 5 Principles of Extreme Weather Survival." 

The key take-aways of this article are the subtitles:


  1. Never Leave Home Unprepared.
  2. Check the Forecast
  3. Tell Someone Before You Go
  4. Be Conservative
  5. Use Common Sense
Do visit my website to download a copy of my trip plan.  This is akin to the pilots flight plan.

Remember the phrase, "the devil is in the details."  Well, Search and Rescue teams deserve as much detail as you can provide. 

Check out Wes Siler's article.  It is certainly worth your time.


Wednesday, April 19, 2017

Getting Accurate Compass Readings


I found these recommendations a while back when I was researching techniques for using a magnetic compass.  A small error when using a compass can result in a significant error in measurement on the ground.


To obtain accurate readings when using a compass:

  • Ensure the compass has been adjusted for declination. 
  • Hold the compass level and steady so the needle swings freely.
  • Hold the compass about waist high in front of the body, except when using a compass with a sighting mirror or a sighting type compass.
  • Raise and lower eyes when taking a bearing, do not move your head. Always use the same eye when taking bearings.
  • Directly face object that is being measured.
  • Magnetic fields will give incorrect compass readings. Avoid taking readings near magnetic fields such as steel, iron (ferrous metals), vehicles, rebar, and clipboards. Even belt buckles, glasses, and rings can interfere with the compass reading.
  • Take bearing twice. 
  • Adjust for magnetic declination as appropriate.
  • Follow the direction of travel arrow, not the compass needle, when walking a bearing. Always follow the line indicated by the compass rather than relying on judgment as to the direction.
  • Use back bearings to ensure you are on track when navigating.

Saturday, April 15, 2017

Plan Your Escape and Evacuation Routes


Planning Your Escape Route

“Alternative and escape routes - Once you have planned your route, plan and check out alternative routes that you may need to take in case of bad weather or if the going gets too much for some party members. In mountainous areas, it is essential to have two or three detailed escape routes should any situation or emergency arise.”


Over the last several years my Search and Rescue (SAR) team has participated in several forest fires operations in Oregon.  The team has helped to coordinate the evacuation of small community neighborhoods and has worked with Forest Service staff to assist stranded hikers.  Getting these hikers out safely has been a priority.  Many hiking groups were met by local Ranger District staff well away from the fire to plan their exit.  Others self extracted.
Thankfully, there have been no personnel casualties.


As bad as this fires have been, there have been several lessons learned.  One has been to plan an escape route.  Develop the plan at home before hitting the trail.

The threat to the hiker ranges from fire, weather (snow, rain and wind) to a geologic event (earth quake).


When evaluating an escape route I recommend the hiker consider several elements. 
First, take a look at your topographic map and tail guides to determine potential escape routes.  Evaluate the terrain.  Are there barriers due to slope and vegetation?  This is especially true should the hiker need to “bush whack” cross country.  A conversation with a ranger can be invaluable.


Second, is the route achievable and realistic for you and your group?  Is your group fit, healthy and ready for such a hike?  


Third, are there sources of water along your route?  In some cases blue stream lines on a topographic map should be colored brown in the summer as stream beds dry up.


Forth, carry the right gear?  Does the day hiker have the ten essential in the pack?

Communicate your change of plans to friends and family.  Let that responsible person (designated to call 911 if you are late) know your plans too.


Don’t forget to fill out the trail permits when traveling in the backcountry.  These are invaluable to narrow down who was still in the backcountry.  In several cases, contact numbers were called to verify the safe return of a hiker.  Take this seriously.  One fellow used the Portland Airport designator (e.g., PDX) as the home address.  This was not helpful.


Monday, February 13, 2017

Go or NoGO

You are in the backcountry and in a survival situation.  You need to make a decision.  Do you remain in place or "self rescue" and head out.

My friends Peter Kummerfeldt and Leon Pantenburg have both posted articles on this
Blake Miller/Outdoor Quest Image
subject.  This post captures some of their comments and my additional suggestions.


"Does anyone know you are missing? If you left a “trip plan” with friends or family members, and you did not deviate from the plan, a search will begin as soon as the trip plan expires and the authorities are notified.  The plan should include, at a minimum, your destination, departure and return dates and times, the names of those traveling with you, the kinds of clothing and equipment carried and the outdoor experience of the party."

Check out a suggested trip plan.
This plan is a critical first step and it's one taken before leaving for the trail head.  
Blake Miller/Outdoor Quest Image

Critical to this first step is to have the right gear.  A day pack with the "ten essentials"
is a must have.

Make a plan.  While waiting for rescue decide if it is better to remain in place or attempt self rescue.  Don't let your movement compound your situation.

Is anyone in the group injured?  If so don't leave that individual alone.

Get SAR activated early.  Call 911 and energize a rescue beacon (SPOT, InReach) early while there is still light.  It can take hours before SAR may arrive on the scene. 

Gather the material necessary to build a fire.  

Set up an emergency action shelter.  This can be a tarp or a tent.  
Blake Miller/Outdoor Quest Image


Thursday, November 17, 2016

Your Personal Outdoor Plan

There are lots of articles and posts discussing the importance of  letting a responsible person know about your travel plans .  Should you not return home on time they are the trigger to begin the search process.


Further, building your personal outdoor plan is important too.


Outdoor Quest/Blake Miller image
After the loss of James Kim in the Oregon back country in 2006 I wrote a hiker's trip plan and posted it on my web site.  I had input from several valued sources.  I wanted something better for the wilderness traveler than a note to a neighbor.  My intent was to provide the search responders something valuable to go by.


In far too many SAR missions, the reporting party has little information for the searchers to go on to begin their search.

My plan can be found here.  It is a basic .pdf form.

Suggestions are certainly welcome.


Recently while reading a Linkedin email, I received a tip on what might be the most complete plan yet.  It's from Paul Kirtley's blog.  He is an  experienced bush craft author in the UK.  This plan is much like the hiker's flight plan.  It includes a place for a picture of the hiker, data for one's route and much more.


Check out Paul Kirtley's plan here.


911 Call center
Still, that responsible person plays a huge role in contacting authorities to begin a search.  My recommendation would be to pick a person that will make the 911 phone call without hesitation.

Travel safely.

Friday, November 11, 2016

Ten Essentials and the Norwegian Mountain Code

While researching the ten essentials a few years ago I came across a post about the Norwegian Mountain Code.

1967, Norway tragically lost 18 backcountry hikers during an Easter weekend storm.  Later the Norwegian Red Cross and Norwegian Mountain Touring coordinated the development of the code; a common sense approach to back country winter travel.

The code compliments the Ten Essentials and builds on it.

The Norwegian Mountain Code captures the elements of travel that includes:


#1
Plan your trip and inform others
about the route you have selected.
#2
Adapt the planned routes
according to ability and conditions.
#3Pay attention to the weather

#4
Be prepared for bad weather

#5
Choose safe routes


#6
Bring necessary equipment


#7
Use a map and a compass.
Always know where you are.


#8

Don't be afraid to turn around
#9
Conserve your energy and  seek shelter if necessary.
Each item (above) is covered in more detail on the web site.