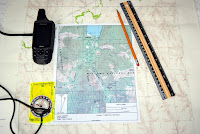
Map, Compass & GPS

Map, Compass & GPS
Wild flowers along Fall Creek on the way to the Green Lakes - Oregon

Thursday, November 7, 2019

Apple Watch to the Rescue

Two hikers in New Jersey say that an Apple Watch is to thank for saving their lives after a terrifying fall.
James Prudenciano says he was with a date hiking in Hartshorne Woods Park in Highlands when they ended up falling off the ledge of a cliff.
Following the fall of nearly 100 feet, and with the couple thinking the worst, Prudenciano’s Apple Watch called 911. The fall apparently triggered the device’s hard fall detection feature and sent his GPS coordinates to 911.Watch

Tuesday, October 22, 2019

Weather System trcking


Monitoring  and tracking the weather is a great backcountry skill.  Here is another method to consider.

Last June SeattleBackPackersMagazine posted a short article on tracking barometric pressure with a GPS; barometric pressure.  Recently my son reminded me of a little known theorem that helps the hiker’s situational awareness.  This theorem is called Buys-Ballot’s Law.


In 1857 Dutch professor Christopher Buys Ballot postulated that there was a relationship between wind direction and air pressure. Buys-Ballot’s law provides a rough approximation of the location and direction of the low pressure system as it tracks through a region.

Simply put in the northern hemisphere, if one faces the wind, the center of a low pressure system will be to the right and slightly behind the observer.  High pressure will be to the left and slightly ahead of the observer.   Further, weather systems in the northern hemisphere track from west to east.  

Importantly for the hiker, a low pressure system is associated with rain, snow and bad weather in general.  A high pressure system is associated with improving weather conditions.

So, if the hiker determines that high pressure is to the west of the present location, and because the system will move from west to east, the weather may be improving.

The YouTube video by meteorologist Vince Condella presents this nicely; video

Buys-Ballots Law coupled with a GPS are both useful tools to improve the hiker’s ability to monitor and anticipate the weather in the backcountry.


Monday, September 30, 2019

Lost In the Backcountry


The hunter sat quietly through my GPS class.  No questions were asked but he was especially attentive and focused.  He was “pinned to my hip” during the night field exercise where we entered GPS waypoints and navigated through town.  The hunter had plenty of questions as we marched along using GPS and compass.

As we wrapped up the field portion the hunter commented, “I guess you’ve heard of me?  I know your Search and Rescue (SAR) team pretty well now.”  He told me about becoming lost during deer season in Oregon’s Three Sisters Wilderness.  After class he went into more detail.  Much to his credit, during the next class session he shared his experience of being lost in the backcountry.

He helped his sister field dress, hang and skin her first mule deer.  No one wanted the deer’s hide so he wrapped it up, mounted his horse and road down several abandoned logging roads to dispose of it. His route twisted through the wilderness.  The hunter found a spot and rested a while.  The lodge pole pine was thick like a thicket.  The horizon was obscured.

Prior to this trip he had built a first aid and survival kit filled with gear.  But today his pack with the GPS, fire starter and shelter remained in camp.  After all, this was a short trip.  The plan was to be back well before twilight.

Darkness caught up when he began his return.  It wasn’t long before he was turned around and lost.  Thankfully, he stayed in place through the night.  He became cold and damp from a light rain that moved through the Cascade Mountains after midnight.  Sleep was impossible.

Around 10:00 that night his sister called 911 and the county’s SAR team began to search.  He was found after first light.

Disappointed and embarrassed, he promised to improve his backcountry skills.  His wife was emphatic about the GPS class offered at the Community College.
This scenario is repeated all too frequently across the country.  People going out for a short hike in the backcountry leave their important gear behind. 


It Has to Work For You

So what is the right stuff to carry in the outdoors?  What is the minimum?  What should you consider before hitting the trail?
A climbing group in the 1930s, The Mountaineers from Seattle authored the “Ten Essentials” describing ten items that should always be carried in the backcountry.  “The Ten Essentials” has been modified by different groups over the years.  Consider this list the foundation of your kit.
Test you equipment before you go afield.  In my Wilderness Survival class I emphasize the phrase “it has to work for you.”  Friends enjoy providing input and helpful suggestions.  Don’t blindly assume these are sound recommendations.  Test that new stove during harsh winter conditions.  Determine if dryer lint fire starter will actually ignite in the rain or if it will burn hot for six minutes. 

Interestingly, in my Wilderness Survival class I hear,”… this is used by the Special Forces." Well, OK, but is that really true or better yet, is that important for your needs.  Because our Special Forces might use a “chem. light” to signal with, a bright strobe will be a better signaling device for you when lost.  It gets down to research, experience and honest evaluation.
The bottom line is that whatever you put in your pack, your equipment has to work for you.  It needs to be able to work rain or shine, at altitude, simply, and with little effort.  Finally, wherever you go this pack must go with you every time; no excuses.
Getting Ready
Invest the time in your own personal training and education.  Start a plan to get ready for the next hunting season.  Let me frame this for you by suggesting the following strategies.
We can all use a refresher in First Aid.  Much has changed with CPR; the techniques of 2000 have been improved.  Give serious consideration to a Wilderness First Aid class.  This is a time consuming (16 hour), pricy ($150-$200) class that provides you with the serious tools of backcountry emergency care.  Why not make it fun and have the entire hunting party take the class. Find classes through the American Red Cross or the National Outdoor Leadership School (NOLS).

Understand the basics of land navigation.  Major outdoor retailers and Community Colleges offer classes.  Land navigation is not hard but it is a perishable skill.  If you are the team navigator, your skill and techniques have to work for everyone.  For more information visit my web site at www.outdoorquest.biz.
Wilderness Survival is a topic that has become very popular. Take a class that provides you with the latest on new products, equipment and techniques.  Classes that take a commons sense approach to survival with modern component s is my recommended first priority.  Primitive skills could follow later and will complement what you have learned.
Dedicate an afternoon to serious evaluation of your hunting day pack.  Lay everything out on a table and go through it.  Dump the old batteries, refresh the first aid kit, test you gear, remove expired foods and medications and replace what is broken.

Invest your time at the rifle range.  Treat your rifle for what it is – a precision piece of equipment.  Accuracy comes with time, effort and patience.
Get in shape.  Backcountry travel is strenuous.  Your exercise regimen should be strenuous too.  Now is the time to begin.
Step by step you can become better prepared and ready for your fall hunt.  Develop your marksmanship and land navigation skills.  Build up your pack with the essentials that will work for you.  Have confidence in your equipment.  And no matter what you do never leave the day pack and survival gear behind.

Refresh Your GPS Slills


Now is the perfect time to practice and improve your GPS skills.  Fallvhiking,  scouting, predator hunts and camping trips offer excellent opportunities to get “dialed-in” with your receiver.

GPS will get you back to the truck or help you return to your favorite spot.   Confident use of the receiver comes with practice and frequent use.

Here are some simple recommendations to try in the field.

  • Dump those old AA batteries, put in new ones, and replace them again in 4 months.  If you leave your GPS on all day in the field expect to change the batteries nightly.  Consider using lithium AA’s, they last longer and work better in cold temperatures.

  • Verify that you are receiving enough satellite signals.  Check this on the satellite status screen.  Four satellites are the minimum.

  • Keep you navigation simple.  It’s easier to work with a handful of waypoints rather than list of 300.   Delete the old waypoints, the ones you will never use again.  Log important waypoints (e.g., the elk wallow) on your PC or in a notebook.  Visit www.easygps.com or www.garmin.com for a place to store waypoints.

  • Give key waypoints names.  Enter names like “camp” and “truck.”  It’s easier and more meaningful to find “truck” in the list of waypoints than is waypoint 542; or was it 245.    

  • Verify all waypoints saved by either checking on our map page or in your waypoint file (select “go to” or “find.”)

  • When its time to return to a destination chose “GO TO” or “Find” on your keypad or menu.  Select the waypoint from the list provided.  Press the “Page” button and rotate through the many displays to the “Compass” page.  With a “GO TO” selected, a large arrow should appear on the face of the compass.  As you move towards your destination the arrow will shift causing you to adjust your course.  When you are on course the arrow points to the top center of your receiver.

  • Compliment GPS skills with a good review of map and compass fundamentals.  Learn to back up electronic position fixing with bearing triangulation.   Worst case, a broken GPS becomes a paper weight for your map while afield.

I suggest checking out Lawrence Letham’s book GPS Made Easy from the library.  This book compliments the owner’s manual.  An excellent reference for map and compass use is June Fleming’s Staying Found.

Taking a class can further enhance you GPS knowledge.  Classes are frequently offered through the local community college’s continuing education program or at local retailers such as REI.


Tuesday, September 17, 2019

Winter Travel

I recently did a search on www.sectionhiker.com, looking for some tips and recommendations for backcountry travel in the winter.
 ."Winter can be a dangerous time to hike or camp in the backcountry, but with planning and proper preparation, a winter hike can be a safe and enjoyable experience. Please keep the following in mind when planning an outing:
  • For safety, never hike alone in winter. The potential consequences are simply too high.
  • Daylight hours are short in the winter and the sun goes down quickly. Begin your trip early in the day and be prepared with a headlamp and extra batteries. Lithium batteries are more reliable in cold weather than alkaline ones.
  • Leave a trip itinerary with a friend who knows who to call if you are late in returning."

         Sectionhiker.com, has several other recommendations that the hiker should consider..

  •  

Sunday, August 18, 2019

Blue Green Algae

Our local news outlet recently had a post about blue green algae. A big healthy Lab swam through the algae, groomed his coat by licking it  and ingested the poisonous algae/

Stay away from this toxic water algae bloom.

The following is a post from about two years ago.  It's a real problem.

Blue/Green Algae is really toxic to your pet.  Keep away.

Every summer in the Cascades of Oregon hikers and campers are warned about Blue Green algae.  The warnings arrive as the temperatures rise.  In some cases the algae infestation can become quite dangerous.

Algae are microscopic organisms that grow naturally in the lakes and waters of Oregon.  Some species such as cyanobacteria can produce toxins that can cause serious illness or death in pets, livestock and humans.

Warnings are provided by the State's Office of Public Health.  Severe conditions can be visually detected by the presence of a thick scum or foam that is white, brown, blue green or bright green.

Contamination systems range from a mild skin irritation to dizziness, paralysis, cramps, vomiting and diarrhea.

So, when in doubt stay out and don't drink it.

Importantly for the hiker, you can not treat the toxins.  Water filtration and boiling has not been proven to be effective.

Should your pet become covered with the algae immediately wash them with water from another source.  Do not allow them to lick the algae off their body. 

For a detailed report on Blue Green Algae visit the US Forest Service site here Blue Green Algae.

Saturday, August 17, 2019

The Ten Essentials.

   
On a warm afternoon in July, a family leaves a trail head with the goal of summitting the South Sister Mountain in Central Oregon.  It was a rough hike as they took a path not frequently traveled.  By evening it became obvious that this group would not make it to the summit and the glacier they were attempting to cross was icing up; it just wasn’t safe to press on.  911 was called and a local SAR team reached them after midnight.  The temperature on the glacier was quickly dropping below 40° (F) and the hikers were getting cold.

When the SAR team reached them, they found that the group had some food and water but no other gear.  The hikers’ clothing selection was questionable too.

What is the right stuff to carry in the outdoors?  What is the minimum?  What should you consider before hitting the trail?

A climbing group in the 1930's, The Mountaineers from Seattle authored the “Ten Essentials” describing ten items that should be carried in the back country. 

“The Ten Essentials” has been modified by different groups over the years.  The following is the list that REI recommends:

  1. Navigation
  2. Sun protection
  3. Insulation (extra clothing)
  4. Illumination
  5. First-aid supplies
  6. Fire starter
  7. Repair kit and tools
  8. Nutrition (extra food)
  9. Hydration (extra water)
  10. Emergency shelter

This is the minimum that one should carry.  It is a starting point.

For a more detailed look at what should go into your survival kit take a look at “Build the Perfect Survival Kit” by John D. McCann.  This book evaluates equipment and provides suggestions for kit components based on your outdoor needs.  For example, he has check lists for the day hiker and expands that to the deep woods trekker or SAR team member.
  
Now that you have the gear, what should you consider as you head in to the back country?

I was searching the Internet last year looking for other suggestions on wilderness travel planning.  I came across a web site hosted in Norway.  I read that after a series of accidents and 18 deaths on Easter 1967, the Norwegian Red Cross and Norwegian Mountain Touring authored what is known as the Norwegian Mountain Code.  (To find this information in detail, Google search on “the Norwegian Mountain Code.”)

The basic elements of the code are (and I am quoting from the site):

  1. Be prepared -Be sufficiently experienced, fit and equipped for your intended trip.
  2. Leave word of your route – Tell a responsible person your travel plan. (See the recommended Hikers Trip Plan at    click on links.”)
  3. Be weather-wise - An old adage advises that you should always be alert to forecasts of bad weather, yet not rely completely on forecasts of good weather.
  4. Be equipped for bad weather and frost. - Always take a rucksack and proper mountain gear. Put on more clothing if you see approaching bad weather or if the temperature drops.
  5. Learn from the locals.
  6. Use a map and compass.  Take a GPS too.
  7. Do not go solo. - If you venture out alone, there is nobody to give you first aid or notify a rescue service in an emergency.
  8. Turn back in time - sensible retreat is no disgrace. - If conditions deteriorate so much that you doubt you can attain your goal, turn around and return.
  9. Conserve energy and build a snow shelter if necessary.. 


The Scouts got it right – be prepared.

Friday, August 16, 2019

Wolf Attack

There was a good short post on last night's evening news (NBC).

A family was camping in Canada when attacked by a wolf.

See the story below.  Wolf Attack

Magnetic Declination

Declination: A Noun. The horizontal angle between the true geographic North Pole and the magnetic North Pole, as figured from a specific point on the Earth.”


 Declination is a term that causes “brain cramps” for many of my students in my map and compass classes. When I mention Magnetic Declination eyes roll.


The web site www.magnetic-declination.com has an excellent discussion of what declination is and what causes it:


“Magnetic declination varies both from place to place, and with the passage of time. As a traveler cruises the east coast of the United States, for example, the declination varies from 20 degrees west (in Maine) to zero (in Florida), to 10 degrees east (in Texas), ......the magnetic declination in a given area will change slowly over time, possibly as much as 2-25 degrees every hundred years or so.......... Complex fluid motion in the outer core of the Earth (the molten metallic region that lies from 2800 to 5000 km below the Earth's surface) causes the magnetic field to change slowly with time."

Land navigation is based on the relationship to the North Pole; also known as “true north.  The measure of degrees of direction in relation to true north is called “degrees true.”  Maps are laid out in degrees true.  Land features (buttes, mountains, streams) on a topographic map are in reference to degrees true.  By that I mean the bearing from one mountain peak to another will be referenced in degrees true.  The map below illustrates that point. 


Magnetic compasses do not point to true north (the North Pole); the magnetic needle points to an area that could be considered the magnetic North Pole. 
As illustrated below, declination data can be found in the diagram at the bottom of a USGS topographic map, (on some commercially produced maps it can be hard to find.) 

Because declination changes over time, I recommend that map declination information be verified at www.magnetic-declination.com.   This is essential in the Pacific Northwest where maps are notoriously out of date in terms of road,  and city data.
So, how do we make this simple?  How do we convert magnetic to degrees true?
I could do the math.  In Oregon, where I live, the magnetic declination is 15.6° East declination.

My recommendation: have the compass do the work so that there is no confusion with the math.

To do this, I need to choose a compass that can be adjusted for declination.  Some examples are the Silva Ranger or the Suunto M3.

With one of these compasses, the compass dial or housing is adjusted and rotated manually.  Both the Suunto and Silva Ranger come with a small, flat adjusting tool.  Consult with owner’s manual that came with the compass.

If declination is Easterly (Western U.S.) I will rotate the dial causing the baseplate’s orienting arrow to move in a clockwise direction.

   If declination is Westerly (Eastern U.S.) I will rotate the dial causing the baseplate’s orienting arrow to move in a counter-clockwise direction.

Now, adjust the dial and align the red magnetic needle on top of the orienting arrow (the red arrow engraved on the baseplate) the compass will provide directions in degrees true.

Thursday, August 15, 2019

Storing Your Camping Gear

The following post is by Guest Contributor Lee

You will need to store your camping gear between outdoor activities. However, don't just throw all your items into a closet. Instead, follow these camping gear tips to ensure you are ready for your next adventure.

Put Your Items in a Secluded Place

Unless you go for an adventure every week, you probably want your camping gear to stay in a safe and secluded space. Space needed will depend on how much equipment you need to store, but some of the places where you can store your camping gear include the garage, an unused closet, or the attic. Consider finding a self-storage unit if you don't have enough space in your house to keep your camping gear.

Keep Your Camping Gear in a Sealed Container

Don't just go with the cheapest option when you are looking for camping storage containers. Instead, look for containers or shelves that meet your needs and are durable. You could store outdoor gear on heavy duty wall shelves or in portable lockers that can serve as a bench while camping. Make sure to get tightly sealed containers if you live in an area with high humidity. Moreover, tie-down loops and reinforced handles can help secure the storage locker in your vehicle.

Label Every Package

Once you have sorted out the gear, place them in labeled containers. It can be advantageous to use clear packages as they let you see what is inside. However, labeling makes it easier to find an item. You can use a permanent marker to write on the bag or packaging container. Alternatively, you can apply self-sticking labels to each container or bag. Self-sticking tags can be an attractive option especially if you want to make changes later or if you are short-sighted.
Your labeling options can change a bit if you are using fabric containers such as canvas bags. You can use a sewing machine to personalize your gear. Alternatively, you can attach luggage tags to the handles. You can use duct tape to make personalized luggage tags. You can also write descriptions on slips of paper and attach them to your bags or containers using a laminator. You can use whatever is at your disposal to be as creative as possible.

Keep the Odor at Bay

Nothing is more irritating than pulling out your camping gear before an adventure and discovering that it smells awful. Your camping gear can be ruined by dirt, mildew, and/or bad odor. It is necessary to clean your camping gear thoroughly before your next trip. Clean and dry your camping gear, especially your bedding and tent before even storing it to avoid a disgusting smell. You can also pack a dryer sheet along with your camping gear to help with the smell.

Compartmentalize Smaller Items

To help keep track of everything, it would be good to put small, related items together. You can keep cooking gadgets and utensils in something like a toolbox. You can browse the internet to find boxes of different sizes and shapes to ensure you find the container that fits whatever you want to store. Plastic bags are an inexpensive and convenient option for storing as well. You can even recycle items such as comforter bags and coffee cans to reduce the costs. You will be able to find what works best for you.


Hopefully these tips can help you figure out how best to store your camping gear between trips this summer. You’re going to want to be able to find everything each time you go, and maybe incorporating a few of these can help you. 

Tuesday, July 30, 2019

Talking to Strangers

This post is about discussing how you you train your children to deal with stranger dealing with strangers in the backcountry.

I clearly remember my parents telling me that I was never to talk to strangers.  Strangers just weren't safe.


It was a different country in 1958.  A parent could tell their child to walk to the corner market with a list of items to purchase.

Sadly, today we read/hear about the abduction of young people all to frequently.

Let's frame the discussion.


Perhaps you are on a camp out at the local state park. After lunch your two boys can not be found.  Finally, the park Ranger calls the county Sheriff who in turn calls out/activate the Search and Rescue (SAR) team to find and rescue the boys.

In my county (in Oregon) SAR is maned by roughly 70 volunteers and a hand full of paid staff (deputies).  It can take20-50 minutes for those volunteers to respond and report to the SAR facilities.  For a large search that require assets from surrounding counties a large scale search For the volunteers to respond and rendezvous at a specific locations.

Every SAR team member wants the lost hiker to be rescued.  And, every one of the SAR team are strangers.  Should your boys not respond to the SAR voices or whistle blast.

I'd recommend that you and your children have and carry the "Ten Essentials." which includes a whistle.  Practice what you want to have your hikers do.

Ten Essentials:Ten Essentials


Sunday, July 21, 2019

Navigating a Topograhic Map


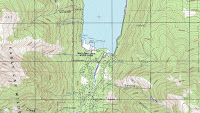
Reviewing a topographic map is usually the starting point for the planning of any back country trip.  A topographic map is your road map to the outdoors.  It provides you detailed information at a scale that is meaningful and detailed.  For years, the US Geologic Survey (USGS) has been the principal publisher of accurate maps.  Within the last decade we have seen many innovations in mapping products that include new mapping companies and publishers, software, maps for the GPS, and “Apps” for the iPhone.
Outdoor Quest/Blake Miller image

Still, the USGS map remains the standard for back country navigation (visit the USGS’s site at www.topomaps.usgs.gov.)   I’d also recommend looking at June Fleming’s “Staying Found” or Bjorn Kjellstrom’s “Be Expert With Map & Compass.”  Once you develop a map foundation you will easily shift to many of the other products on the market today. 

Many publications, videos, and web sites will give you a te rundown on the features, symbols and components to a map.  This article will discuss a few of the key features that you should be aware on a 7.5 minute map.

·         Contour Lines These are the thin brown lines that snake across the map.  Contour lines connect equal points of elevation such that every point on that line will be at that elevation above sea level.  Visually, the contour lines give you a mental three dimensional view of the terrain.  These lines provide a view of slope and pitch, depressions, ridge lines and level ground; the highs and lows of the earth’s surface. 
Outdoor Quest/Blake Miller image
 These lines provide shape and a sense of texture. There are two primary types of lines, index and intermediate lines.  Index lines stand out as they are a touch wider, a darker shade of brown and indicate the elevation with numbers such as 4500; the elevation is in feet.  Between the index lines are the thin intermediate line that are spaced uniformly and further define the elevation, slope and contour.  The intervals between the intermediate lines are specified at the bottom of the map adjacent to the scale data.

·     Scale Consider scale as your view of the map; it is like your “overhead zoom” setting.  To cut to the chase, a 7.5 minute map or quadrangle has a scale that is referred to as 1:24,000; where one inch is equal to 2000 feet.  It is your best source of information of the back country.  At this scale, the map has much more validity and provides more usable information for your backcountry planning.  You can view important landmarks, streams and geographic features.  To complete the navigation picture I always refer a second map, such as a map of the national forest (e.g., the Deschutes National Forest.)  Commonly, such a map will be “zoomed” way out and have a scale of 1:100,000 or 1:250,000.  Imagine that such a map would be made up of many 7.5 minute quadrangles.

·    North  Features on a map such as trails, roads, mountain peaks and streams are all laid out in relation to true North; the North Pole.  The north-south borders of the map and the small declination diagram are your best references for true North.  Other grid lines (such as the red Township, Section and Range lines) may not be aligned to true north at all.  Be careful of these lines should you need to triangulate your position on a map.

·    Declination This is the angular difference between true North and Magnetic North.  The red needle on your magnetic compass points to Magnetic North.  The accuracy of the information found in the Declination Diagram is dependent on the age of the map.  To get the latest declination for any area visit www.magnetic-declination.com.

Personally I use a magnetic compass that I can adjust for declination; it just makes my navigation easier.  When adjusted, my compass provides bearing information in degrees true as does my map and my adjusted GPS.

·    Coordinates Latitude and Longitude (Lat/Long) are the familiar coordinate system to most outdoorsmen and women.  Coordinate data is found at the top and bottom corners of each map.  Lat/Long coordinate increments are also found every 2’ (minutes) and 30” (seconds) on the sides of the Map.  A scaling device is necessary to pull complete coordinates off a map; this is a pain.

In the 1940’s a coordinate system know as Universal Transverse Mercator (UTM) was developed.  To keep a very long story short, your 7.5 minute map has a new grid laid over it, the grid dimensions are 1000 meters by 1000 meters.  For more complete   information on UTM grid visit the USGS’s web site UTM or Lathem’s “GPS Made Easy” (which is probably at your local library.)

Simplicity is the essence of UTM.  Scouts, hunters and hikers have joined Search and Rescue (SAR) teams around the country in using this system. 

Your GPS receiver can easily be switched to UTM from the set-up menu.

·    Bar Scales   Notice the bar scales at the bottom of the 7.5 minute map.  The scales provide measuring data in miles, feet and meters.   On the far left side of the meter scale, the scale is broken down into units of 100 meters, this applies directly to UTM.

Notice on the scale bar (feet) that 1 inch equals 2000 feet.

·    Map Datum Information about map datum is found in the lower left corner of a 7.5 minute map.  I have found that the simplest definition from GPS maker Garmin is:

“A math model which depicts a part of the surface of the earth. Latitude and longitude lines on a paper map are referenced to a specific map datum. The map datum selected on a GPS receiver needs to match the datum listed on the corresponding paper map in order for position readings to match.”

The bottom line: most 7.5 minute maps are made to the North American datum of 1927 (NAD27 or NAD27 CONUS on your GPS).  New GPS receivers are set to datum WGS84.  The difference between the datum could be over 100 meters/yards.  The solution: When pulling points off a map shift your GPS’s datum to match the map. 

If precision is not an issue for your outing don’t worry about datum.

As you begin your trip planning don’t forget the magnetic compass, the important partner to any topographic map.  See Selecting a magnetic Compass for more information about buying a good compass.