Map, Compass & GPS

Map, Compass & GPS
Wild flowers along Fall Creek on the way to the Green Lakes - Oregon

Tuesday, August 26, 2014

A Mini Survival Kit

Here are several mini kit options and recommendations.

Mini, pocket sized survival kits are in every outdoors store. But, really, what good are they?
by Leon Pantenburg


Several years ago, the editor at the newspaper I worked at tasked me to write a practical winter survival guide for Central Oregon. It was an investigative reporting assignment, and I interviewed local experts from the Deschutes


This survival kit weighs about as much as your IPod. Carry it in a waterproof container for added security.
This Altoids tin survival kit weighs about as much as your IPod. Carry it in a waterproof container for added security. Don’t waste space!


County Search and Rescue team , as well as local survival equipment tester, the late Jim Grenfell, and internationally-known survival expert Peter Kummerfeldt.

The end result of months of research and testing was a system that included a personal, pocket-sized kit as well as a complete backpack setup for hardcore winter survival. (No survival kit system is perfect, and no kit will work for everyone. View any system as a baseline for developing a kit that will work for you.)

To read the rest of Leon's post go here.

Saturday, August 23, 2014

Marking a GPS Waypoint

Trust but verify that the GPS waypoints that you have marked are saved.

There is nothing magic here.  Then again, there is nothing worse than that sinking feeling when you are in the backcountry, it's time to return the trailhead, you select "trailhead" and that waypoint isn't listed in the waypoint library.

So here are a few suggestions about marking a waypoint.

  1. While driving to the trail head, place the GPS receiver on the dash and let it begin receiving satellites.
  2. After parking, place the receiver on the hood or in a spot where it will have a good sky view.
  3. Take a look at the satellite information page.  (On some models you may have to go to your "main menu" page to find this display.)  Ideally you will find that the receiver is tracking more that 4 satellites.  There should also be an indication that you have a "3D" position fix; "2D" is not acceptable.
  4. Mark your waypoint as usual.  Perhaps you will give it a name; trailhead.
  5. Now verify that the waypoint has been saved.  This is key.  I find that there are two easy ways to do this.
    • Select the "Find" or "GoTo" button or option.  The waypoint number or name (that you typed in) should be found in your library of saved waypoints.


    • OR, using the page button, go to the map page and you should see the waypoint name visible.  If your receiver zoom setting (as in zoom in or zoom out) is at 20 miles, you may not see the waypoint name.  I keep my zoom setting at 800 feet while hiking and this allows me to clearly see the waypoint name or number (see below, Elk1 is the saved waypoint.)


Another option is to look at your waypoint list.  Select "find," then "waypoints" to take you to the list.  Notice that Elk1 is there too.


If the waypoint isn't there or listed I'll use my track log to help me get back. 

When I am on a hike I will keep my GPS in a case that clips to the shoulder straps of my pack and I leave it on all day.  Batteries are cheap.  At the end of the day I could follow my track history back to the trailhead.


Friday, August 22, 2014

Pre-Trail Maintenance For Your GPS Receiver

The following post I wrote was just presented at www.seattlebackpackersmagazine.com  


  Photo by Davynin Flicker.com
      
Summer is a great time to head for the trail and practice with a GPS receiver. There are several things hikers can do before leaving home. First, make a short checklist so that nothing is forgotten. Begin by checking the electronic setup of the GPS receiver:
  • Take a look at the batteries
  • The coordinate system setup
  • Electronic mapping
  • Review the waypoint management.
Then, tune-up the receiver to maximize position accuracy by looking at how displays and waypoints are managed. Here are a few recommendations to consider.

To read the rest of the post go here.

To read another post about GPS navigation (Marking a Waypoint) go here.

Wednesday, August 20, 2014

Families in the Backcountry


Travel safely in the  backcountry with your family.  Start them early and start them with the right skills.

I wrote the following article a year ago for a local family news magazine in Bend, Oregon.

      My wife and I began our outdoor journeys over thirty years ago while in college.  So, it was natural that my children began their trips in the field at a very early age.  Our family continues to backpack and camp all around Oregon.  Though our children are now in college, we still find our trips memorable; it’s still “cool” to spend time together. 

      Central Oregonians are fortunate to be close to some of the finest forests and trails in the nation.  Our woodlands offer spectacular recreation opportunities and vistas, all at amazingly affordable rates.  Children find the outdoors a place to learn, explore, and let their imagination run wild.
For the complete post go here.

Monday, August 18, 2014

DeLorme inReach Update


Because of my interest with GPS training, rescue beacons and Search and Rescue I thought the August 2014 issue of GPS World had a definite connection to this blog.


Don’t know about you, but I am always a bit cautious about reading the many glowing product reviews on the web or in print.  I consider the sites such as www.sectionhiker.com, www.survivalcommnsense.com and www.GPStracklog.com as my honest brokers for related backcountry gear.


So, I thought it important to capture the essence of Tracy Cozzens' article Never Out Of Reach.


“Please call global rescue.  John broken arm, ribs, internal bleeding.  Fell 70ft crevasse.  Climbed out. Himlung Camp 2.  Please Hurry.”


This was the message sent via DeLorme’s inReach Explorer communicator sent from the Himalayas regarding the injuries received by a member of a research team.   

DeLorme’s unit allows users to send and receive 160 character text message while in the field and in this case in very remote locations.  “…the interactive SOS capability of the inReach automatically triggers remote tracking and allows users to communicate via text with responders at GEOS, Delorme’s partner for international 24/7 search-and-rescue monitoring” wrote Cozzens.

Cozzens concluded the article by stating “inReach communicates over the Iridium satellite network, providing global two-way satellite connection, high network reliability….anywhere on Earth with no gaps, fringe or weak signal areas.  inReach has the ability to maintain a satellite signal lock even in difficult GPS environments, such as in a steep canyon or under a heavy forest canopy, DeLorme said.”

In the spring of 2013 I wrote a product review for www.seattlebackpackersmagazine.com on an earlier Delorme unit; one that was paired to my smart phone.   It worked as advertised and DeLorme provided superb customer support to this technology challenged user.  You can read my evaluation at:


Saturday, August 16, 2014

Plan Your Escape Route


Planning Your Escape Route
Alternative and escape routes - Once you have planned your route, plan and check out alternative routes that you may need to take in case of bad weather or if the going gets too much for some party members. In mountainous areas, it is essential to have two or three detailed escape routes should any situation or emergency arise.”
www.scouts.org.uk


Over the last several years my Search and Rescue (SAR) team has participated in several  forest fires in Oregon.  The team has helped to coordinate the evacuation of small community neighborhoods and has worked with Forest Service staff to assist stranded hikers.  Getting these hikers out safely has been a priority.  Many hiking groups were met by local Ranger District staff well away from the fire to plan their exit.  Others self extracted.
Thankfully, there have been no personnel casualties.


As bad as this fires have been, there have been several lessons learned.  One has been to plan an escape route.  Develop the plan at home before hitting the trail.
The threat to the hiker ranges from fire, weather (snow, rain and wind) to a geologic event (earth quake).


When evaluating an escape route I recommend the hiker consider several elements. 
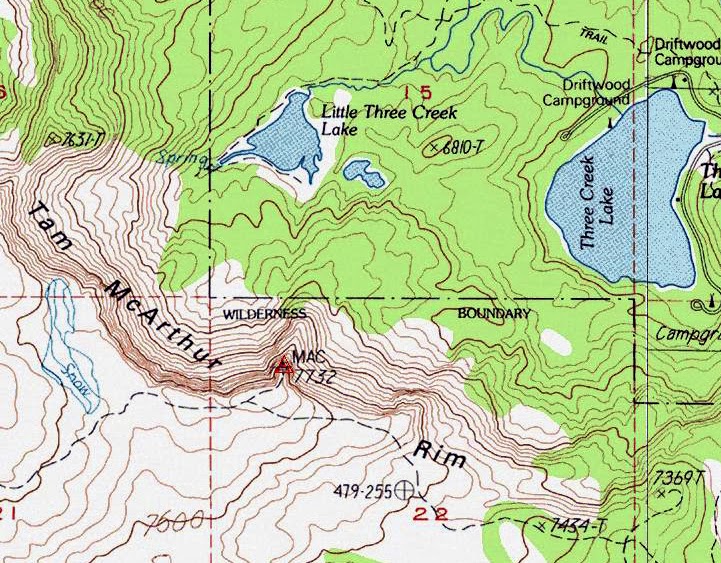
First, take a look at your topographic map and tail guides to determine potential escape routes.  Evaluate the terrain.  Are there barriers due to slope and vegetation?  This is especially true should the hiker need to “bush whack” cross country.  A conversation with a ranger can be invaluable.

Second, is the route achievable and realistic for you and your group?  Is your group fit, healthy and ready for such a hike?  

Third, are there sources of water along your route?  In some cases blue stream lines on a topographic map should be colored brown in the summer as stream beds dry up.

Forth, carry the right gear?  Does the day hiker have the ten essential in the pack?
Communicate your change of plans to friends and family.  Let that responsible person (designated to call 911 if you are late) know your plans too.

Don’t forget to fill out the trail permits when traveling in the backcountry.  These were invaluable to narrow down who was still in the backcountry.  In several cases, contact numbers were called to verify the safe return of a hiker.  Take this seriously.  One fellow used the Portland Airport designator (e.g., PDX) as the home address.  This was not helpful.


Friday, August 15, 2014

UTM Grid - Plotting Your Position On a Map

Recently I was skimming through an article in a respected journal about plotting a hiker's position on a map.  The article focused on using latitude and longitude to plot one's position.  Latitude and longitude has been the standard for backcountry travelers for years.

There is a simpler method that doesn't require a scaling template/tool called UTM Grid.   UTM is intuitive and straight forward.  Use it for a while and the hiker will quickly be able to "eye ball" a position on a map.  It is a natural compliment to a GPS receiver.

I like to keep my navigation simple.

It's a great coordinate system to introduce young folks to as well.


The following is a post that I wrote for Philip Werner at www.sectionhiker.com last spring.


Universal Transverse Mercator (UTM) is a grid system that describes a person’s location in the backcountry.  It is wonderfully simple to understand and use because:

  1. It is intuitive -  it’s concepts can be understood quickly
  2. It can be easily self-taught
  3. Young hikers grasp this system easily
  4. A location on a map can be quickly determined. 
  5. It is a selection option for Global Positioning System (GPS) receivers
Because of its simplicity, UTM is quickly becoming the principal grid system for hikers, hunters and Search and Rescue (SAR) teams nationally.


To read the rest of the post go here.

Tuesday, August 12, 2014

Weather in The Backcountry

This post by sectionhiker.com follows other post found on this blog about the weather.  Philip takes a strong commonsense approach to monitoring and respecting the weather.

by Philip Werner

I saw someone write “I don’t let the weather determine when I hike” on a hiking message board recently, and it’s got to be one of the stupidest things I’ve ever seen. The weather in the White Mountains kills people all year round because people don’t take it seriously enough or understand the dangers it can pose.

The hikers at greatest risk are non-locals who don’t know how to find out the local weather or don’t understand the potential consequences of thunderstorms, getting struck by lightning above treeline, flash floods, high water crossings, wind chill, and hypothermia, and can’t grasp the difficulty of launching a rescue operation in the White Mountains if someone gets in trouble.

To read the rest of his post go here.

Wildland Fire

We simply have to be more careful.

from  Outsideonline

Hunter Charged with Starting Rim Fire

The third largest in California's history


Wednesday, August 6, 2014

Garmin Updates

Update your Garmin GPS receiver.

Updates are available for Garmin receivers now for several units.  This includes the Monterra to 3.20, Montana to 6.10, Oregon to 4.10, GPSMap64 to 3.10 and eTrex to 3.90. 

Can too much technology in the backcountry be dangerous? Can you depend on GPS and other electronic devices and technology  to the point of  it becoming deadly?
That seems to be an increasingly recurrent pattern of behavior in some parts of the country, as the following story: “Death By GPS’  indicates.

Any GPS can mislead you or give inaccurate information.
Whenever I see a particularly interesting or, in this case, disturbing story related to land navigation, I forward it for comment and analysis to land navigation expert Blake Miller.

Here are my thoughts on  “Death By GPS” by Tom Knudson, and published in the Jan. 30, 2011 “Sacramento Bee.” (To read the complete story, click here.)

The scenario mentioned in the “Death By GPS” story  is consistent. Drivers rely solely on their car GPS for directions, they have no map and mostly likely, didn’t talk to anyone about their planned trip.

In Death Valley, 12 vacationer have died under these circumstances over the last 15 years. In Oregon, it was the James Kim family tragedy in 2006 that brought this to the forefront nationally. (To view video coverage of the Kim Tragedy, click here.)

A Death Valley Search and Rescue coordinator commented that: “GPS units are not only fallible but send people across the desert where no road exists.”
I was surprised just how much backcountry road information was provided by the car GPS (a Garmin Nuvi) during a deer hunt last fall on the western slopes of  Oregon’s Cascade Mountains. But GPS road data can be dated. The article commented that some GPS receivers reported closed roads (as active) that had not been used in 40 years!
When traveling with a car GPS, my recommended planning considerations include:
Always carry a map. Maps from the American Automobile Association are a great place to start and complement the car GPS. National Geographic has maps of many of our national parks and are well worth the investment. Delorme’s state gazetteers are wonderful for big picture planning. For deep backcountry travel consider a quality topographic map. (For more information click here.)
Always check in with authorities who can help with your travel planning. Visiting the local Ranger station and visitor center is a good first step. Ask about road and climatic conditions for the area you will be visiting, and what roads are under construction, are permanently closed or are impassible. Many states have online travel sites that provide current conditions. (In Oregon it is www.tripcheck.com.)
• Internet sources may well have the same issues as GPS receiver data bases. Many sites
on the web provide topographic mapping. Take care to notice the age of the maps. Much can be out of date. Google Maps/Earth are fine products when used intelligently.
Place “via points” into your GPS. For example, to keep you on the desired route, insert new destinations so that you’ll stay on the right path. You can add a small town or intersection as a “via point.” This will cause the GPS to use the route you determine, rather that what the data base builds.
A personal locater beacon such as those made by SPOT and ACR are excellent tools to alert authorities when in trouble. The small units are carried in addition to your GPS.
Always let a responsible person know of your plans. This person is someone you will coordinate with in advance of your trip. For example, if you don’t return from your journey this person will call 911; the search doesn’t start until 911 is called. For a suggested trip plan look here.
• Whether traveling on foot or in a car always have the Ten Essentials with you. This is your emergency kit that will go a long way toward sustaining you and your party. For information on the Ten Essentials go here.

You have to be smarter than your electronics. Electronics are our aids, not our decision makers!

Tuesday, August 5, 2014

Map Scale

Maps come in various scales, sizes and variety.  This post makes sense of map scale and what that means to the hiker.

Dictionary.com defines map scale as:

“A ratio which compares a measurement on a map to the actual distance between locations identified on the map.”

A topographic (topo) map’s scale information is located at the bottom center of the map.  Other maps will generally have scale information in the large map key that outlines many of the features and data printed on the map.

The map scale for a United States Geologic Survey (USGS) 7.5 topo minute map is highlighted below.

A closer look of the scale information:


The area circled in red is the ratio discussed by dictionary.com.  Note that the ratio has no units of measurement assigned (e.g., feet, meters, acres.)

To read the rest of the post go here.
I enjoy reading about backcountry travel.  I am also interested in what is the right gear to carry.

I came across the Norwegian Mountain Code last year. 

It's pretty simple.

In 1967, Norway tragically lost 18 outdoors men during the Easter weekend.  Later the Norwegian Red Cross and Norwegian Mountain Touring coordinated the development of the code; a common sense approach to back country winter travel.

The code compliments the Ten Essentials and builds on it.  Read about the code here.

Saturday, August 2, 2014

Land Navigation - Why Backstops are Important (Update)

Sectionhiker.com is web site that I keep my eye on regularly.  The comments section of this excellent source routinely has truely relevent information as well; that is a rareity on most sites.  In an older post about the "Ten Essentials" a reader's comment was:

" Map or at least a good look of the lay of the land to identify a few good backstops in case I get really turned around (mostly only for well marked trails.)" comment by Jess, March 15, 2012.

Jess' comment caused me to write the following post.

--------------

A backstop keeps the hiker safe.  By using a natural and man made land features, a backstop keep the hiker in the right area.  Backstops are found by a careful study of a topographic map. 

One feature every outdoorsman should pay attention to is called a “backstop.”   A  backstop is a boundary or a natural barrier that keeps one in their specified hiking area.  If a hiker goes beyond the backstop, then they will know they have gone too far.

When looking over a map of a hiking area, it is essential to understand the impact of terrain and land features.  Doing so will allow one to build an association of topography with a general lay of the land.  Key on natural and man-made features that includes roads, streams, buttes and buildings.  Take the time to really examine the map’s topography by studying the brown contour lines. This attention to detail will give the hiker a “feel” for elevation changes, shape and important land marks.  More importantly, it will allow the hiker to develop a mental map of the hiking area.  This concept lends itself to map training for those not backcountry experienced, and it is an excellent  teaching tool for children.


For example, in the image above ForestRd 32 serves as a backstop.  The hiker should remain west of ForestRd 32 because traveling east of 32 is hazardous due to the Swamp. Additionally, note that key terrain features associated with the trail include the river, mountains, a road and the swamp.


The example above is very simplistic but demonstrates the importance of having that “mental map”, especially if visibility becomes an issue.


The image above offers another example.

The map above is an area of steep terrain to the west, a lake to the east and trails surrounding most land features.  If the hiker planned to bushwack west of the campground (just below the larger lake) and hike in fairly flat terrain with gentle elevation changes, then the steep terrain to the west (Tam McArthur Rim) would be an excellent backstop. This is because it provides confirmation of the hiker’s general location. Care should be taken when using  trails that border Little Three Creek lake-note that the trail doesn’t continue west.  In such a situation, it is possible for the hiker to walk beyond the lake.


Backstops are another navigation tool that can keep the hiker in a safe location, and should be utilized as a visual resource.